Getting started
Introduction
In this tutorial, you'll learn how to build an app to manage ERC20 approvals for an address in 110 lines of code. This will be your very first app with Fast Dapp.

What is Fast Dapp
Fast Dapp is an open source and free platform for developers of any level to build frontend for their dapps super fast. Build your apps on the webapp, no installation or configuration required. Building your apps is as simple as, using simple and battle tested components, styling it with HTML/CSS, Tailwind and sharing it with your users! Moreover, a large collection of templates are available to inspire you and help you creating your dream app.
Getting started
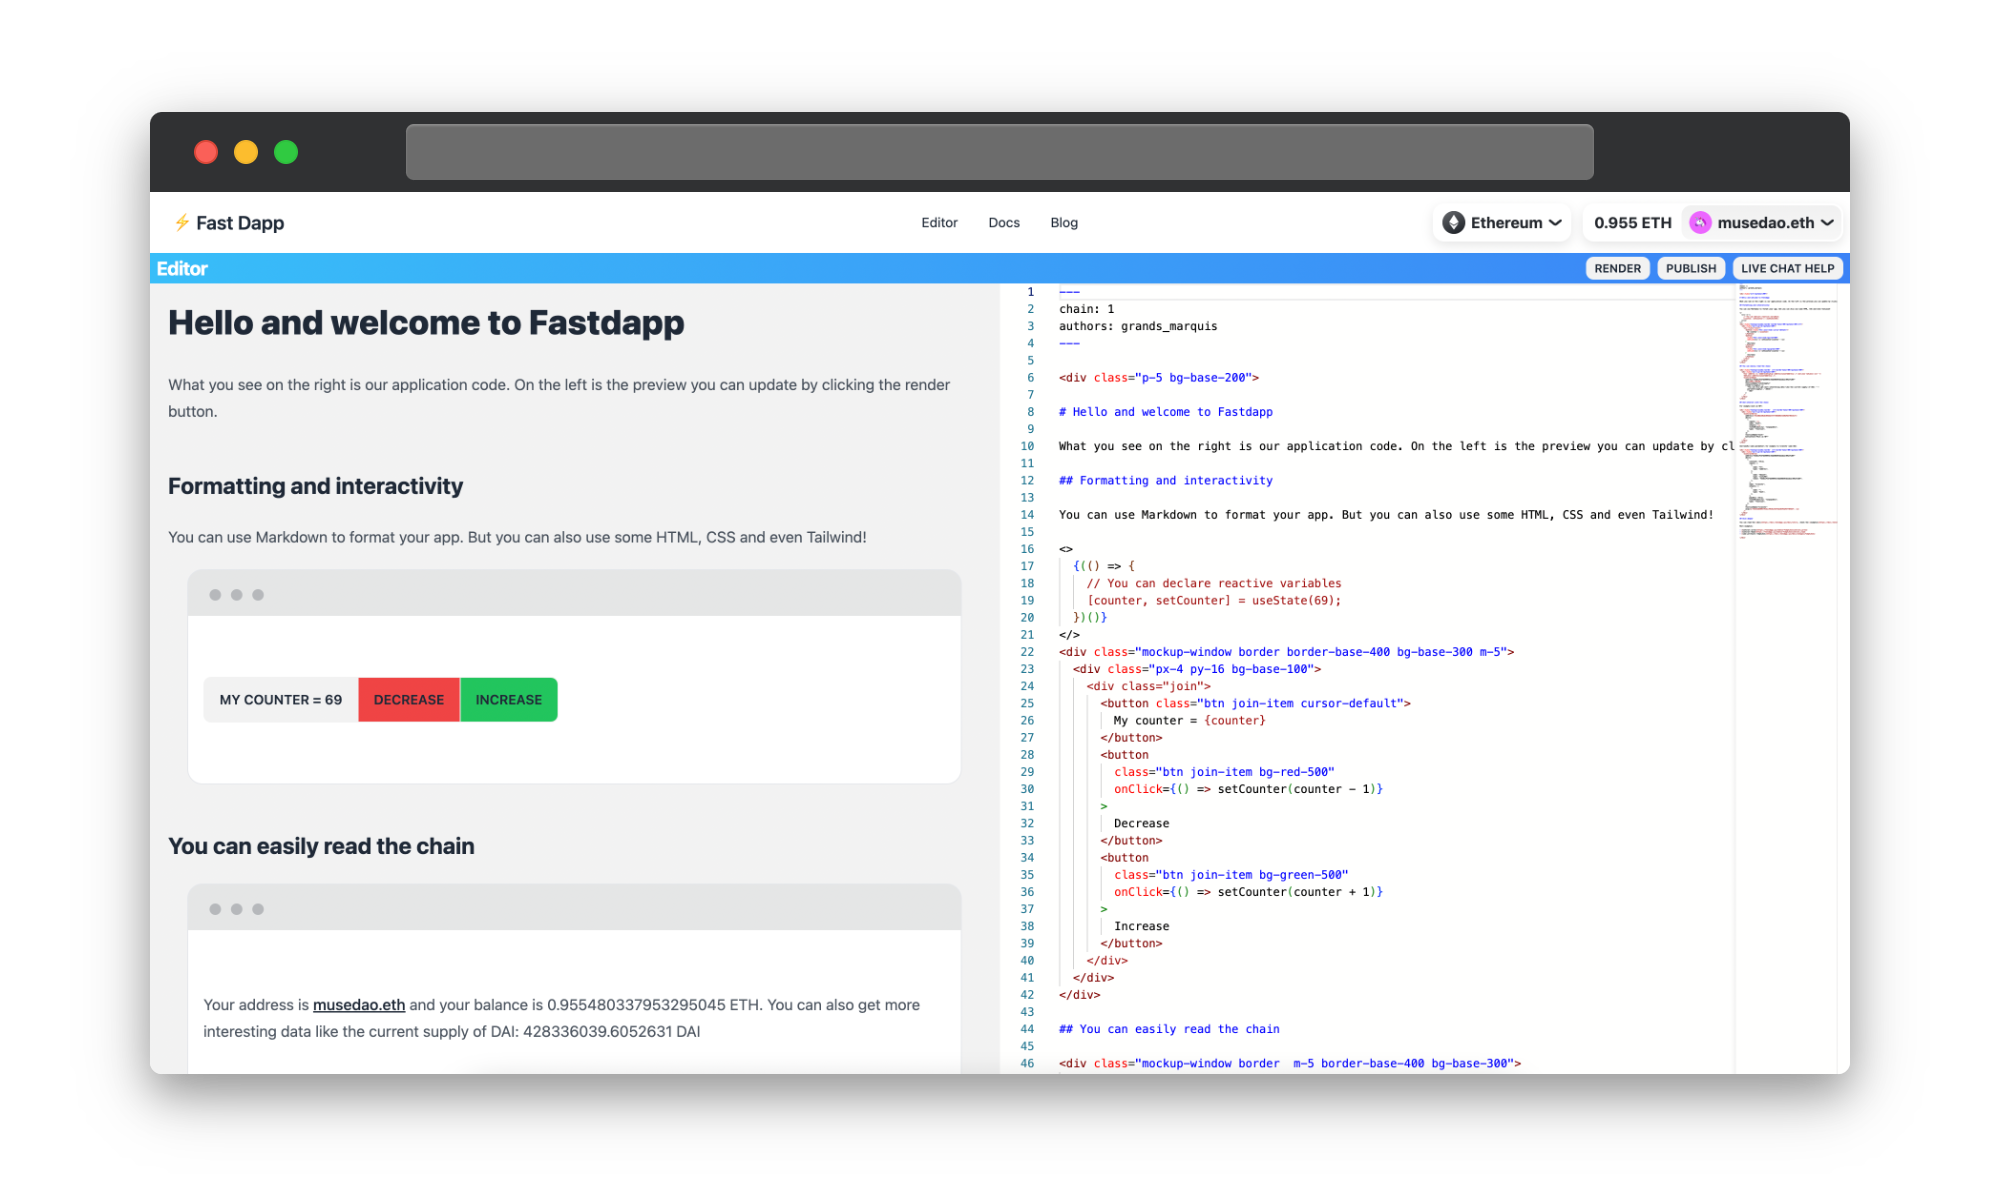
Open the Fast Dapp web editor. Once you connect your wallet with Metamask or your favorite provider you'll see two panels. The right one is the preview: what your app will look like once published? and the right one is the editor where you write your app. You can update at anytime the preview by clicking the Render button at the top right of the editor.

Let's build something together
In this tutorial we'll build together a revoke.cash alternative. We'll list all the approvals an address made and enable the user to remove them in one click.
Getting the data
In order to all the aprovals made by an address user we'll use the Events component. The component fetches the events that were emitted on chain and has a callback function to display them.
In our case we'll pass the following parameters:
addressto null as we want to get all approval events emitted from any contractabi, we'll use the standard ERC20 ABI.eventNameto Approvalargsis used for filtering the results. The first parameter is the account that approved the spending of the tokens. If your address doesn't have previous approvals you can change it to any address.renderour function that will display the data.
<Events
      address={null}
      abi={ABIs.ERC20}
      eventName="Approval"
      args={[userAddress]}
      render={
        (logs) => (
          logs.map((log) => (
            <div>{log.address} - {log.args.spender}</div>
          ))
        )
      }
/>
If you press render at the top right of the editor, you should see a loading indicator then a list of all the Approval events corresponing to your address.

Formatting the data
As we retrieve all approvals events, we now need to only select the latest event of each ERC20 tokens (log.address) and spender (log.args.spender). For this, we'll write a more complex render function:
<Events
    address={null}
    abi={ABIs.ERC20}
    eventName="Approval"
    args={[userAddress]}
    render={
        function(logs) {
            approvals = [];
            logs.reverse().forEach(function (log) {
                 if (log.args.value != null && !approvals.find((aproval) => (aproval.args.spender == log.args.spender && aproval.address == log.address))) {
                    approvals.push(log);
                }
            });
            return (approvals.filter((approval) => parseInt(approval.args.value) != 0)
            .sort((a, b) => b.address - a.address)
            .map((approved) => (
                <div>{approved.address} - {approved.args.spender}</div>
            )))
        }
      }
/>
Displaying the data
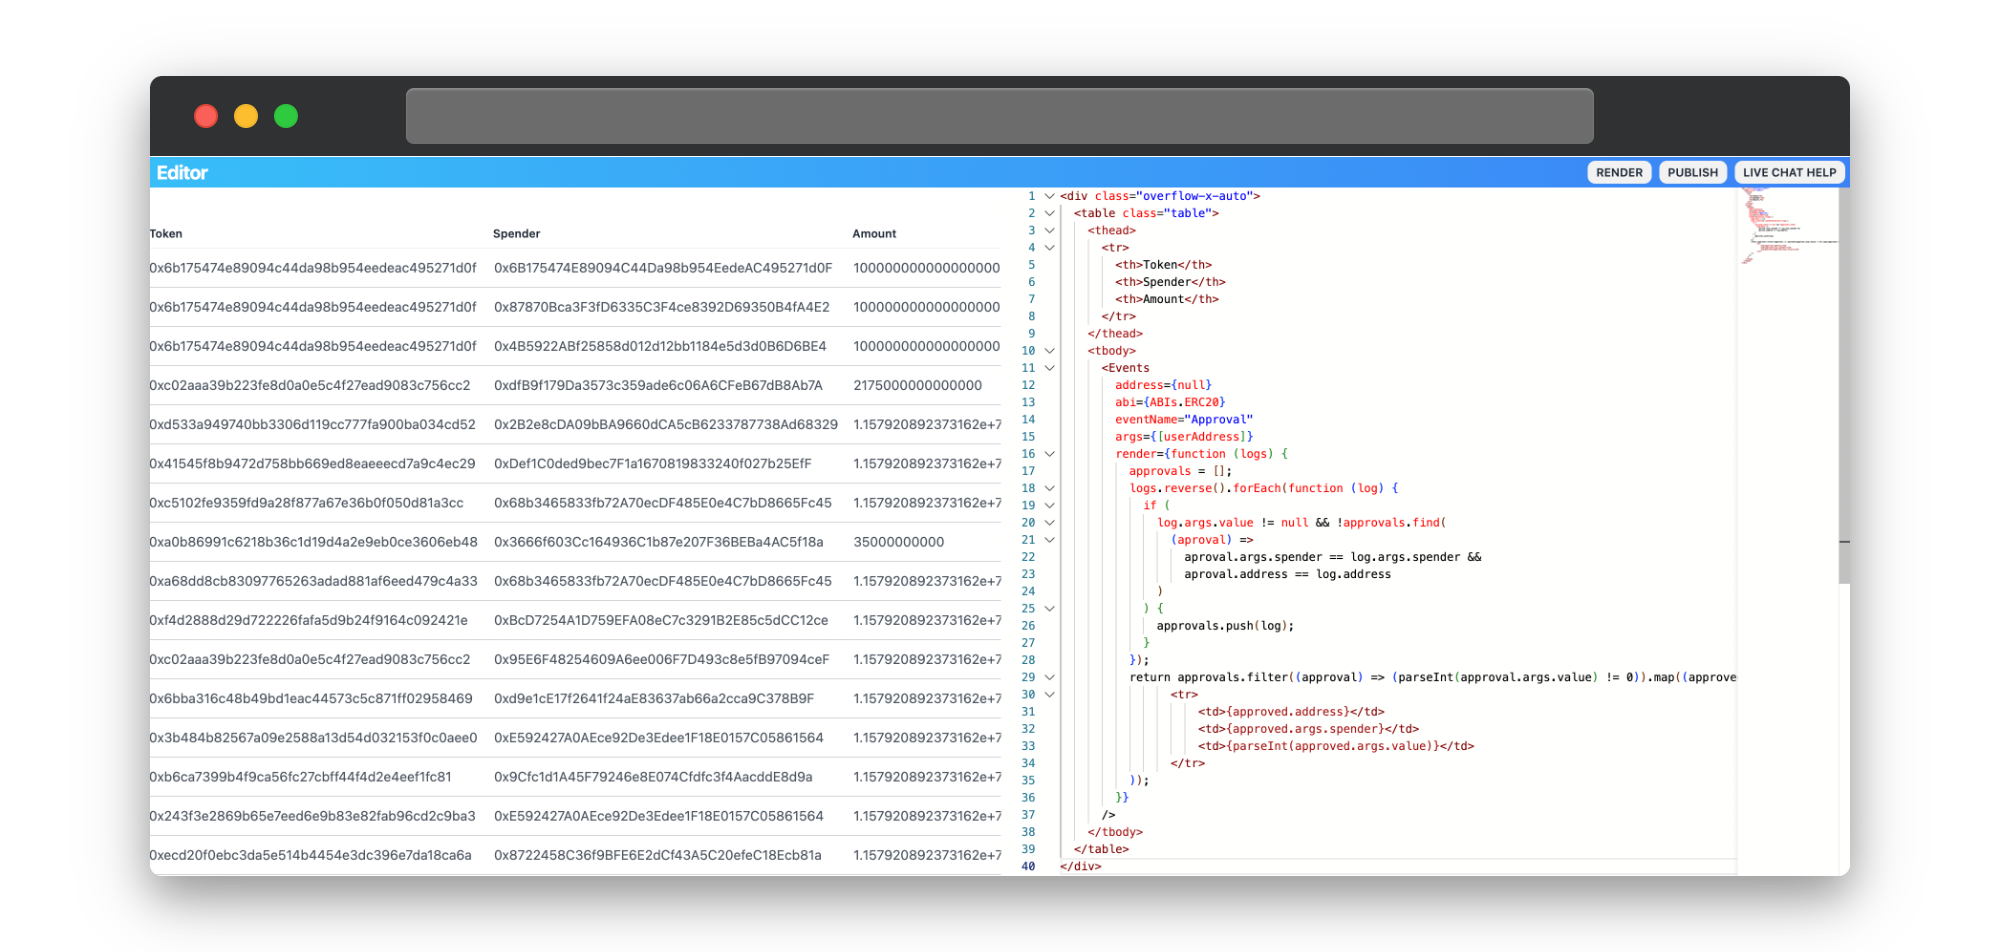
Now that we have clean data, let's display it in an HTML table:
<div class="overflow-x-auto">
  <table class="table">
    <thead>
      <tr>
        <th>Token</th>
        <th>Spender</th>
        <th>Amount</th>
      </tr>
    </thead>
    <tbody>
      <Events
        address={null}
        abi={ABIs.ERC20}
        eventName="Approval"
        args={[userAddress]}
        render={function (logs) {
          approvals = [];
          logs.reverse().forEach(function (log) {
            if (
              log.args.value != null && !approvals.find(
                (aproval) =>
                  aproval.args.spender == log.args.spender &&
                  aproval.address == log.address
              )
            ) {
              approvals.push(log);
            }
          });
          return approvals.sort((a, b) => b.address - a.address)
          .filter((approval) => (parseInt(approval.args.value) != 0))
          .map((approved) => (
                <tr>
                    <td>{approved.address}</td>
                    <td>{approved.args.spender}</td>
                    <td>{parseInt(approved.args.value)}</td>
                </tr>
          ));
        }}
      />
    </tbody>
  </table>
</div>

In order to make the result more beautiful we'll use a few components to display the data:
- TokenName: Display the name of the token from its address
- AddressDisplay: Display an address shortened or its ENS
- TokenAmount: Display a token amount with precision handling
 <tr>
    <td><TokenName token={approved.address} /></td>
    <td>
        <AddressDisplay address={approved.args.spender} />
    </td>
    <td>
        <TokenAmount
            token={approved.address}
            amount={approved.args.value}
        />
    </td>
</tr>
Revoke an approval
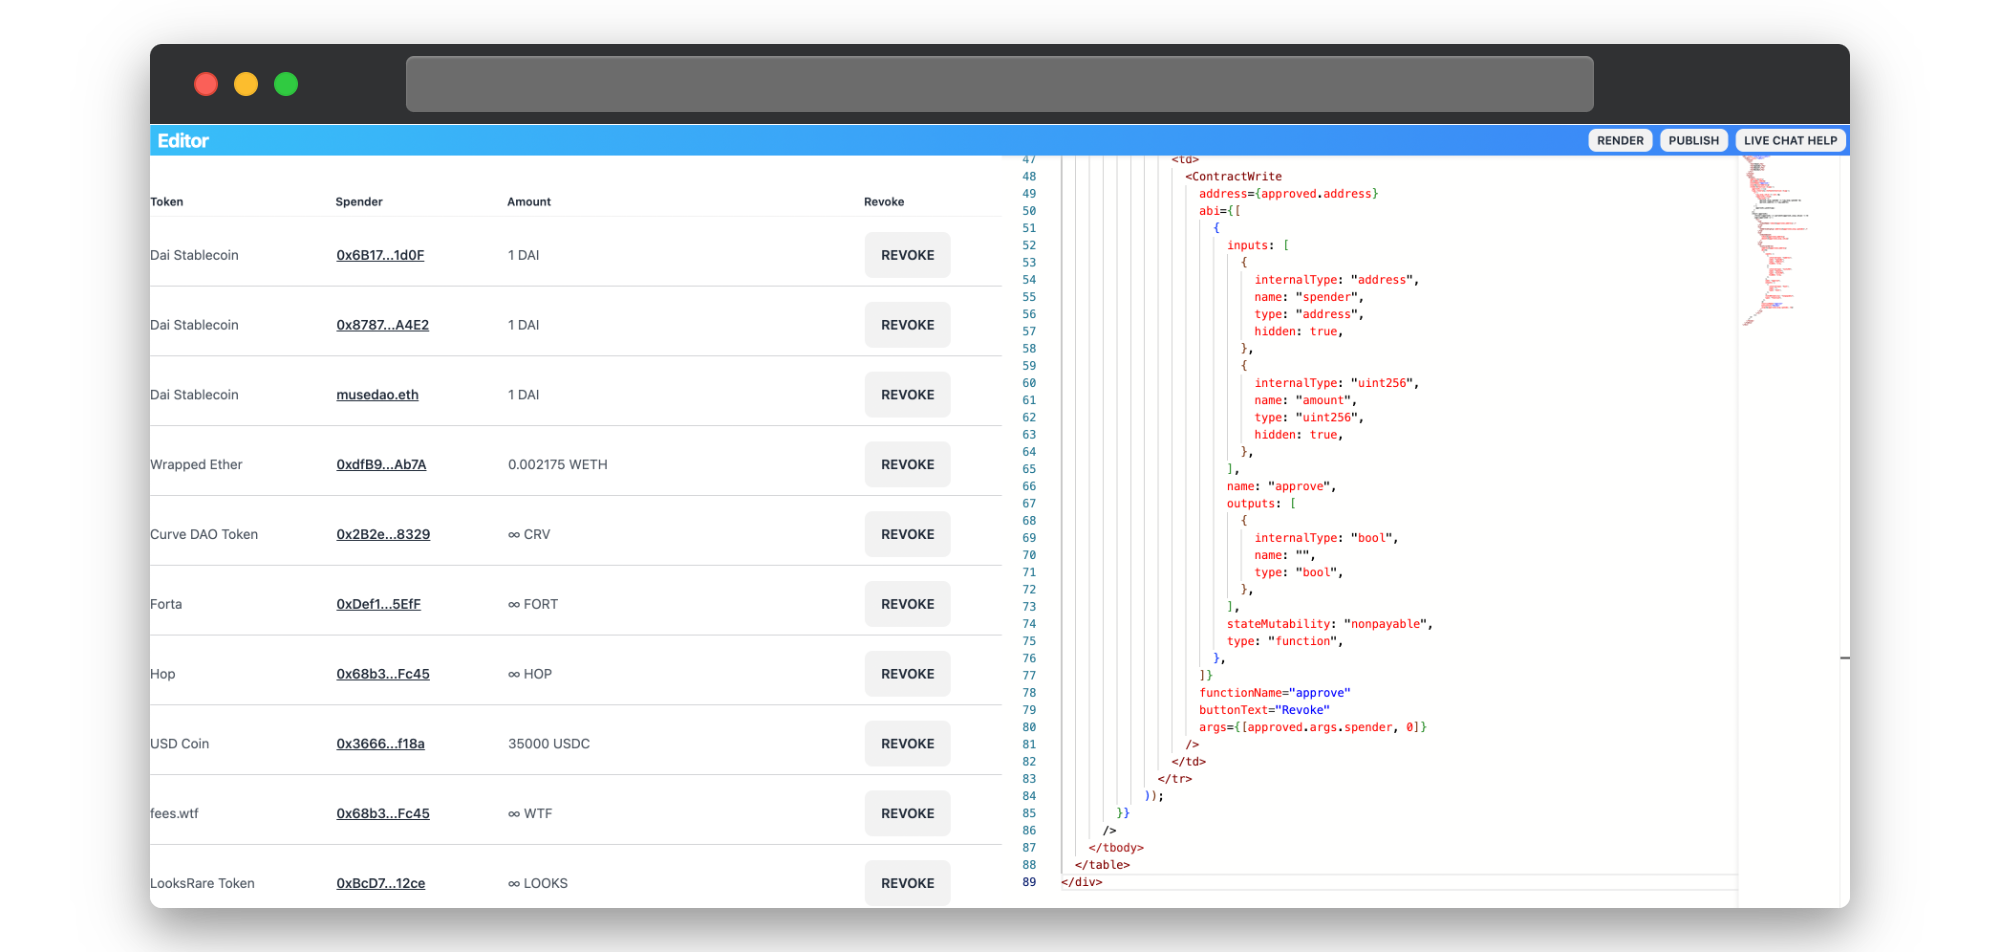
Now we'll use the ContractWrite component to add a revoke button to the approvals. The component accepts a few parameters:
addressthe contract we'll interact with.abithe ABI of the contract, the ABI can be customized to tweak the UI (default parameters, hide inputs, change the button text..).argsthe default arguments
In our case, revoking the contract will looks like this:
<ContractWrite
    address={approved.address}
    abi={ABIs.ERC20}
    functionName="approve"
    buttonText="Revoke"
    args={[approved.args.spender, 0]}
/>
But as you can see the component will show the inputs, let's improve by grabbing the approval ABI and hidding the inputs by adding "hidden": true to the inputs. There are a lot of ways to customize the ContractWrite components like handling token input, approvals, time value..
<ContractWrite
    address={approved.address}
    abi={[
        {
    "inputs": [
      {
        "internalType": "address",
        "name": "spender",
        "type": "address",
        "hidden": true
      },
      {
        "internalType": "uint256",
        "name": "amount",
        "type": "uint256",
        "hidden": true
      }
    ],
    "name": "approve",
    "outputs": [
      {
        "internalType": "bool",
        "name": "",
        "type": "bool"
      }
    ],
    "stateMutability": "nonpayable",
    "type": "function"
     }
    ]}
    functionName="approve"
    buttonText="Revoke"
    args={[approved.args.spender, 0]}
/>
Our complete code looks like this, if you click on the Revoke button you'll see the transaction for removing the approval being asked for confirmation by you.
<div class="overflow-x-auto">
  <table class="table">
    <thead>
      <tr>
        <th>Token</th>
        <th>Spender</th>
        <th>Amount</th>
        <th>Revoke</th>
      </tr>
    </thead>
    <tbody>
      <Events
        address={null}
        abi={ABIs.ERC20}
        eventName="Approval"
        args={[userAddress]}
        render={function (logs) {
          approvals = [];
          logs.reverse().forEach(function (log) {
            if (
              log.args.value != null &&
              !approvals.find(
                (aproval) =>
                  aproval.args.spender == log.args.spender &&
                  aproval.address == log.address
              )
            ) {
              approvals.push(log);
            }
          });
          return approvals
            .filter((approval) => parseInt(approval.args.value) != 0)
            .sort((a, b) => b.address - a.address)
            .map((approved) => (
              <tr>
                <td>
                  <TokenName token={approved.address} />
                </td>
                <td>
                  <AddressDisplay address={approved.args.spender} />
                </td>
                <td>
                  <TokenAmount
                    token={approved.address}
                    amount={approved.args.value}
                  />
                </td>
                <td>
                  <ContractWrite
                    address={approved.address}
                    abi={[
                      {
                        inputs: [
                          {
                            internalType: "address",
                            name: "spender",
                            type: "address",
                            hidden: true,
                          },
                          {
                            internalType: "uint256",
                            name: "amount",
                            type: "uint256",
                            hidden: true,
                          },
                        ],
                        name: "approve",
                        outputs: [
                          {
                            internalType: "bool",
                            name: "",
                            type: "bool",
                          },
                        ],
                        stateMutability: "nonpayable",
                        type: "function",
                      },
                    ]}
                    functionName="approve"
                    buttonText="Revoke"
                    args={[approved.args.spender, 0]}
                  />
                </td>
              </tr>
            ));
        }}
      />
    </tbody>
  </table>
</div>

Polishing
Let's now add some title, description and style our page.
We'll also wrap the table into a PleaseConnect component as we need to enforce that the user is connected to access the userAddress variable.
We'll also add metadata to our app at the beginning of it in yaml format. The metadata are:
themeselect a base theme to make our app looks beautiful. See available themes.titlea title used for SEOdescriptiona description used for SEOauthorwho wrote the codechainan array of chain ID this app is available on.
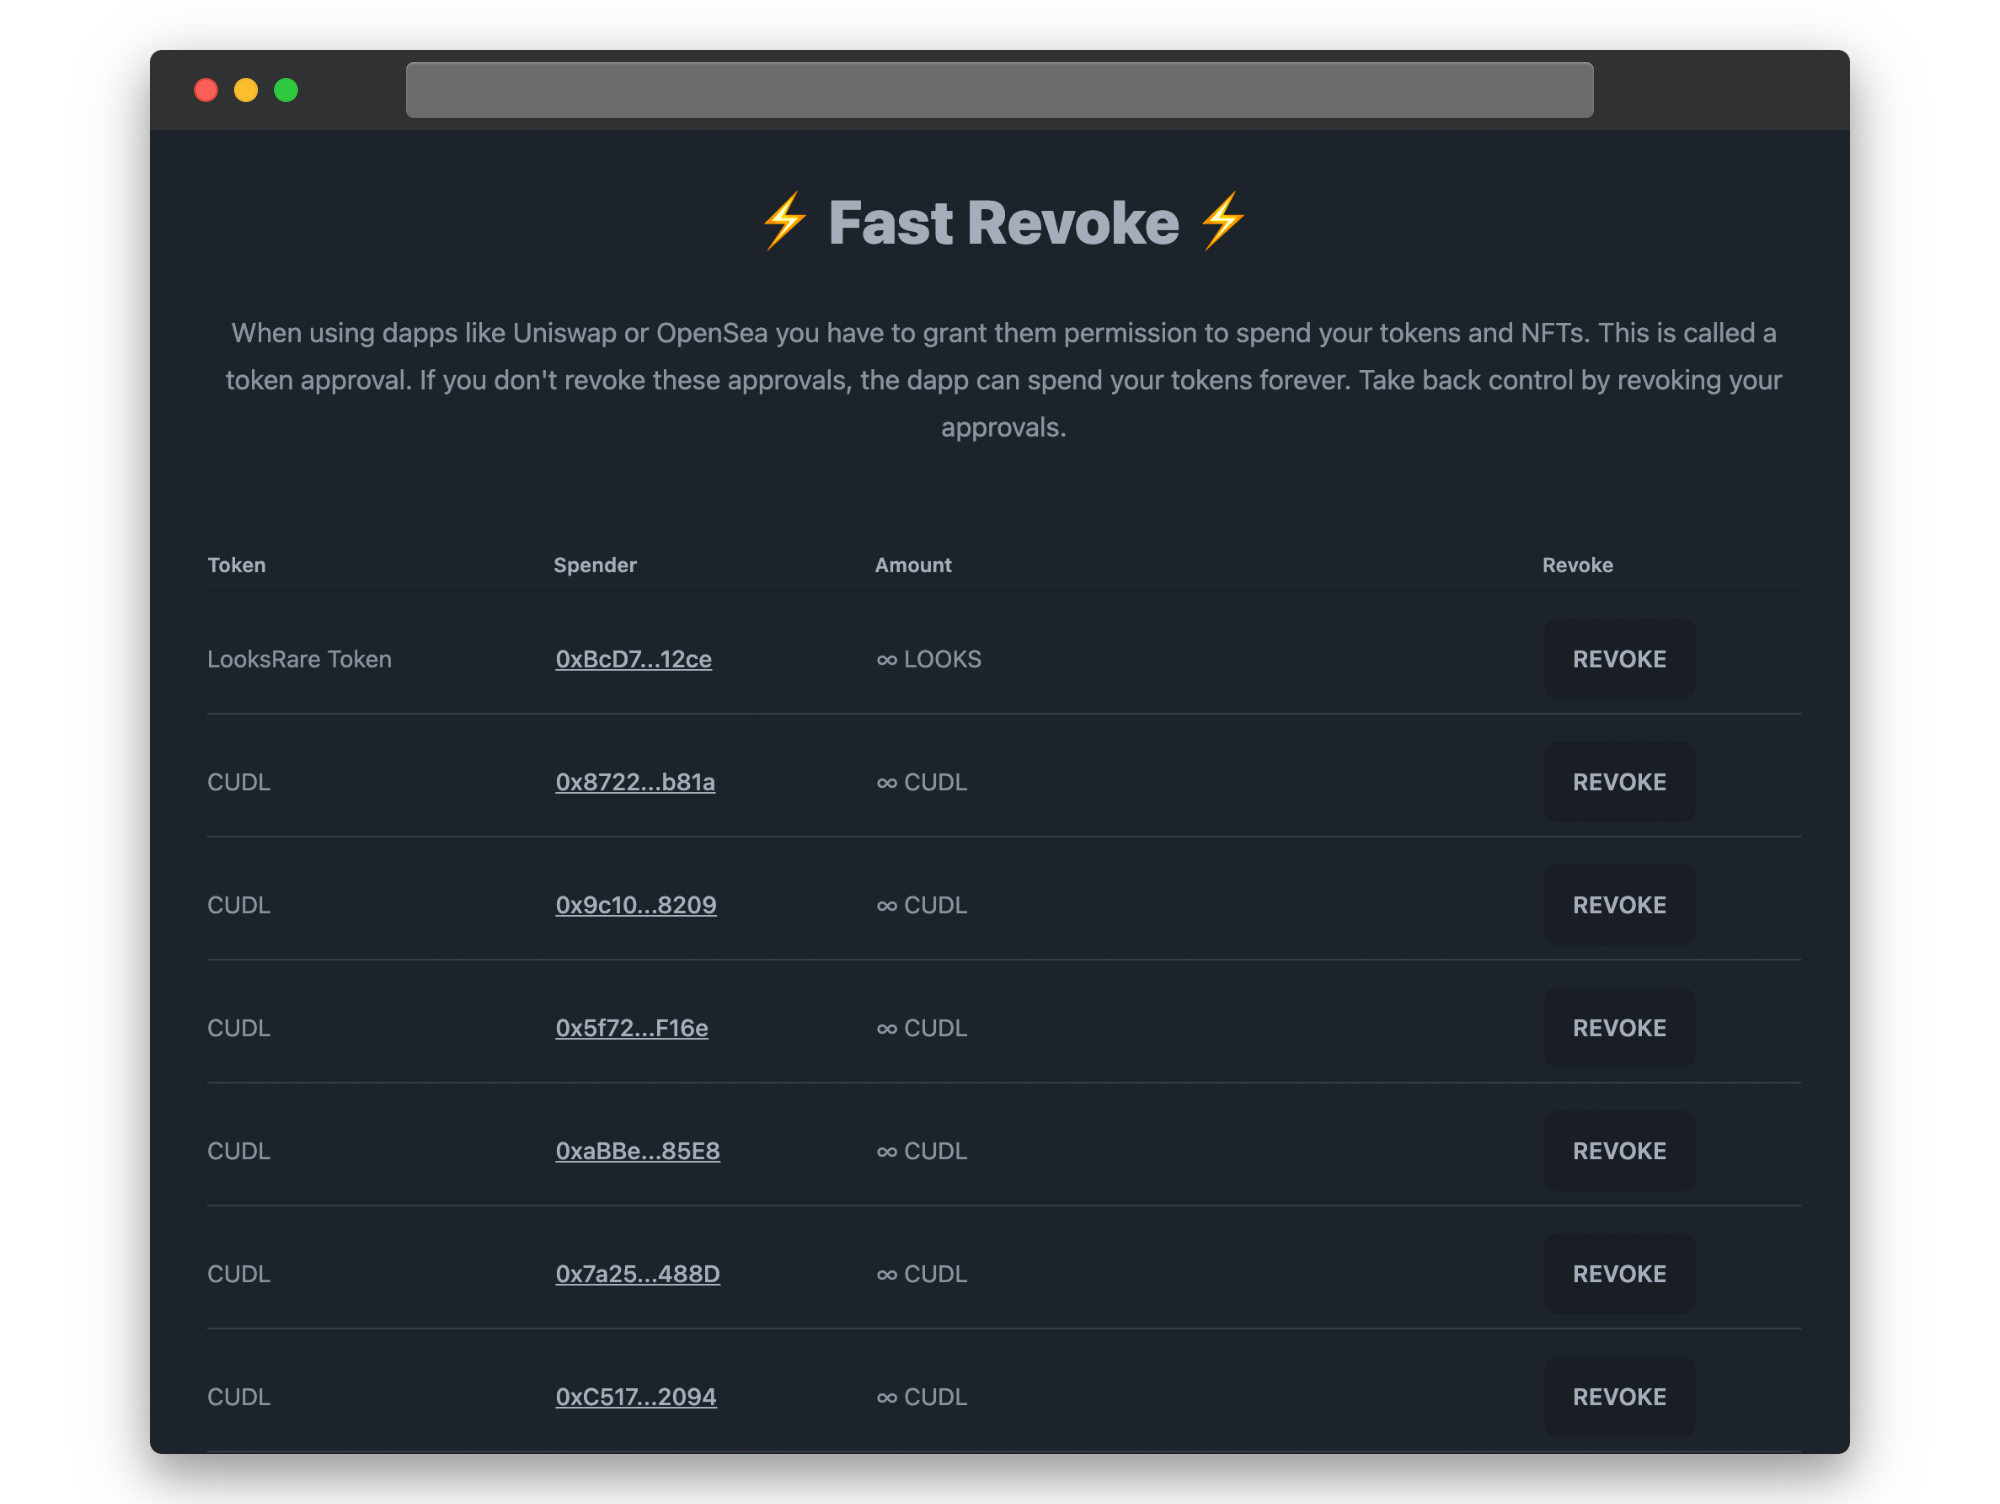
Here is our final code, you can directly see it in the editor or as a published app:
---
chain: [1,10,42161,137,5]
authors: grands_marquis
theme: dark
title: Fast Revoke
description: Manage your ERC20 approvals with Fast Revoke
---

<div class="p-10">
  <center>
    <h1>⚡ Fast Revoke ⚡</h1>
    <p>
      When using dapps like Uniswap or OpenSea you have to grant them permission
      to spend your tokens and NFTs. This is called a token approval. If you
      don't revoke these approvals, the dapp can spend your tokens forever. Take
      back control by revoking your approvals.
    </p>
  </center>
  <PleaseConnect >
    <div class="overflow-x-auto">
      <table class="table">
        <thead>
          <tr>
            <th>Token</th>
            <th>Spender</th>
            <th>Amount</th>
            <th>Revoke</th>
          </tr>
        </thead>
        <tbody>
          <Events
            address={null}
            abi={ABIs.ERC20}
            eventName="Approval"
            args={[userAddress]}
            render={function (logs) {
              approvals = [];
              logs.reverse().forEach(function (log) {
                if (
                  log.args.value != null &&
                  !approvals.find(
                    (aproval) =>
                      aproval.args.spender == log.args.spender &&
                      aproval.address == log.address
                  )
                ) {
                  approvals.push(log);
                }
              });
              return approvals.sort((a, b) => b.address - a.address)
                .filter((approval) => parseInt(approval.args.value) != 0)
                .map((approved) => (
                  <tr>
                    <td>
                      <TokenName token={approved.address} />
                    </td>
                    <td>
                      <AddressDisplay address={approved.args.spender} />
                    </td>
                    <td>
                      <TokenAmount
                        token={approved.address}
                        amount={approved.args.value}
                      />
                    </td>
                    <td>
                      <ContractWrite
                        address={approved.address}
                        abi={[
                          {
                            inputs: [
                              {
                                internalType: "address",
                                name: "spender",
                                type: "address",
                                hidden: true,
                              },
                              {
                                internalType: "uint256",
                                name: "amount",
                                type: "uint256",
                                hidden: true,
                              },
                            ],
                            name: "approve",
                            outputs: [
                              {
                                internalType: "bool",
                                name: "",
                                type: "bool",
                              },
                            ],
                            stateMutability: "nonpayable",
                            type: "function",
                          },
                        ]}
                        functionName="approve"
                        buttonText="Revoke"
                        args={[approved.args.spender, 0]}
                      />
                    </td>
                  </tr>
                ));
            }}
          />
        </tbody>
      </table>
    </div>
  </PleaseConnect>
</div>
Publishing
Once you are happy with the result, you can press the publish button at the top right of the editor. We'll upload your code on IPFS and give you a link to share with others

Conclusion
We managed to build a full application to manage users ERC20 approvals in 110 lines of code. Here are sme ideas you can try to implement to practice more building with Fast Dapp:
- List all approvals history
- Handle ERC721 NFTs approvals
- Display the token balance of the user in the table
- Use query parameters to read the user's address
Let us know if you need any help building on Telegram.