Make an ERC20 transfer app
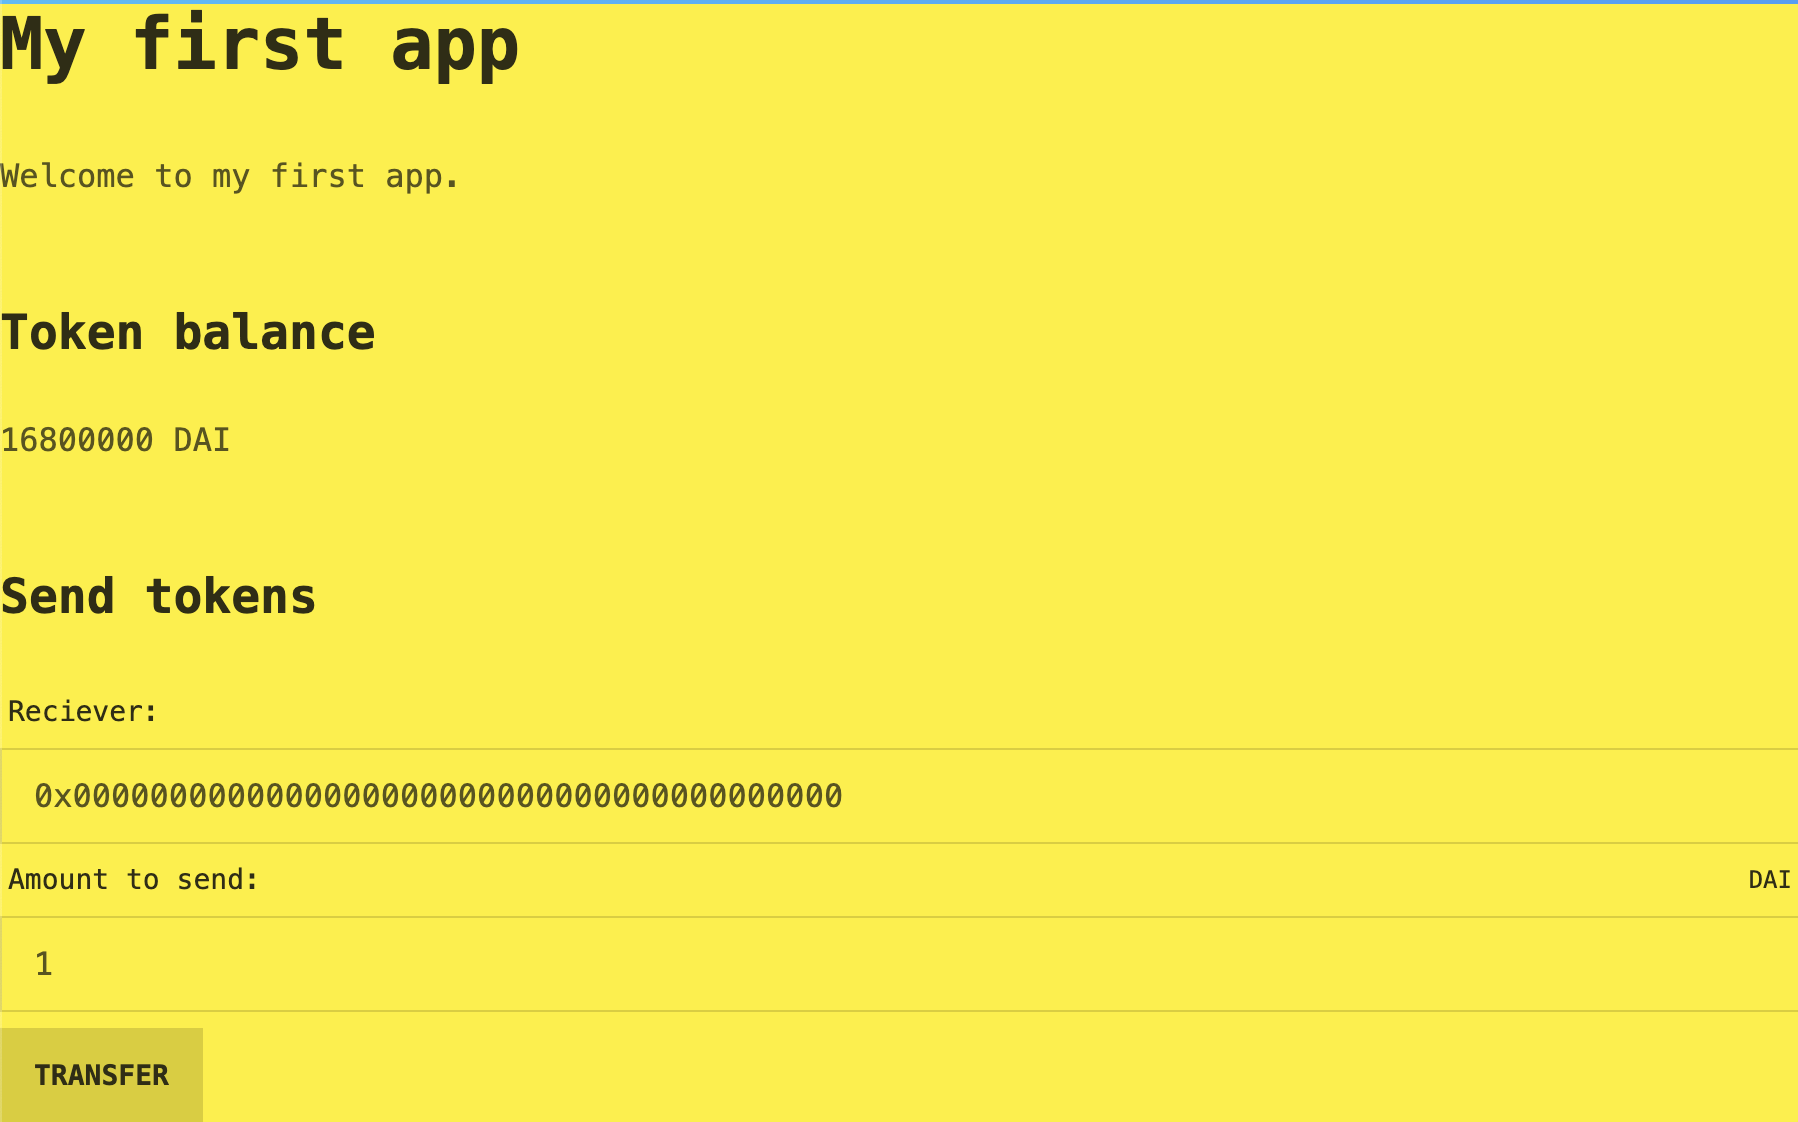
In this tutorial we will cover the basics to build your very first app. Here is what it will look like when finished:
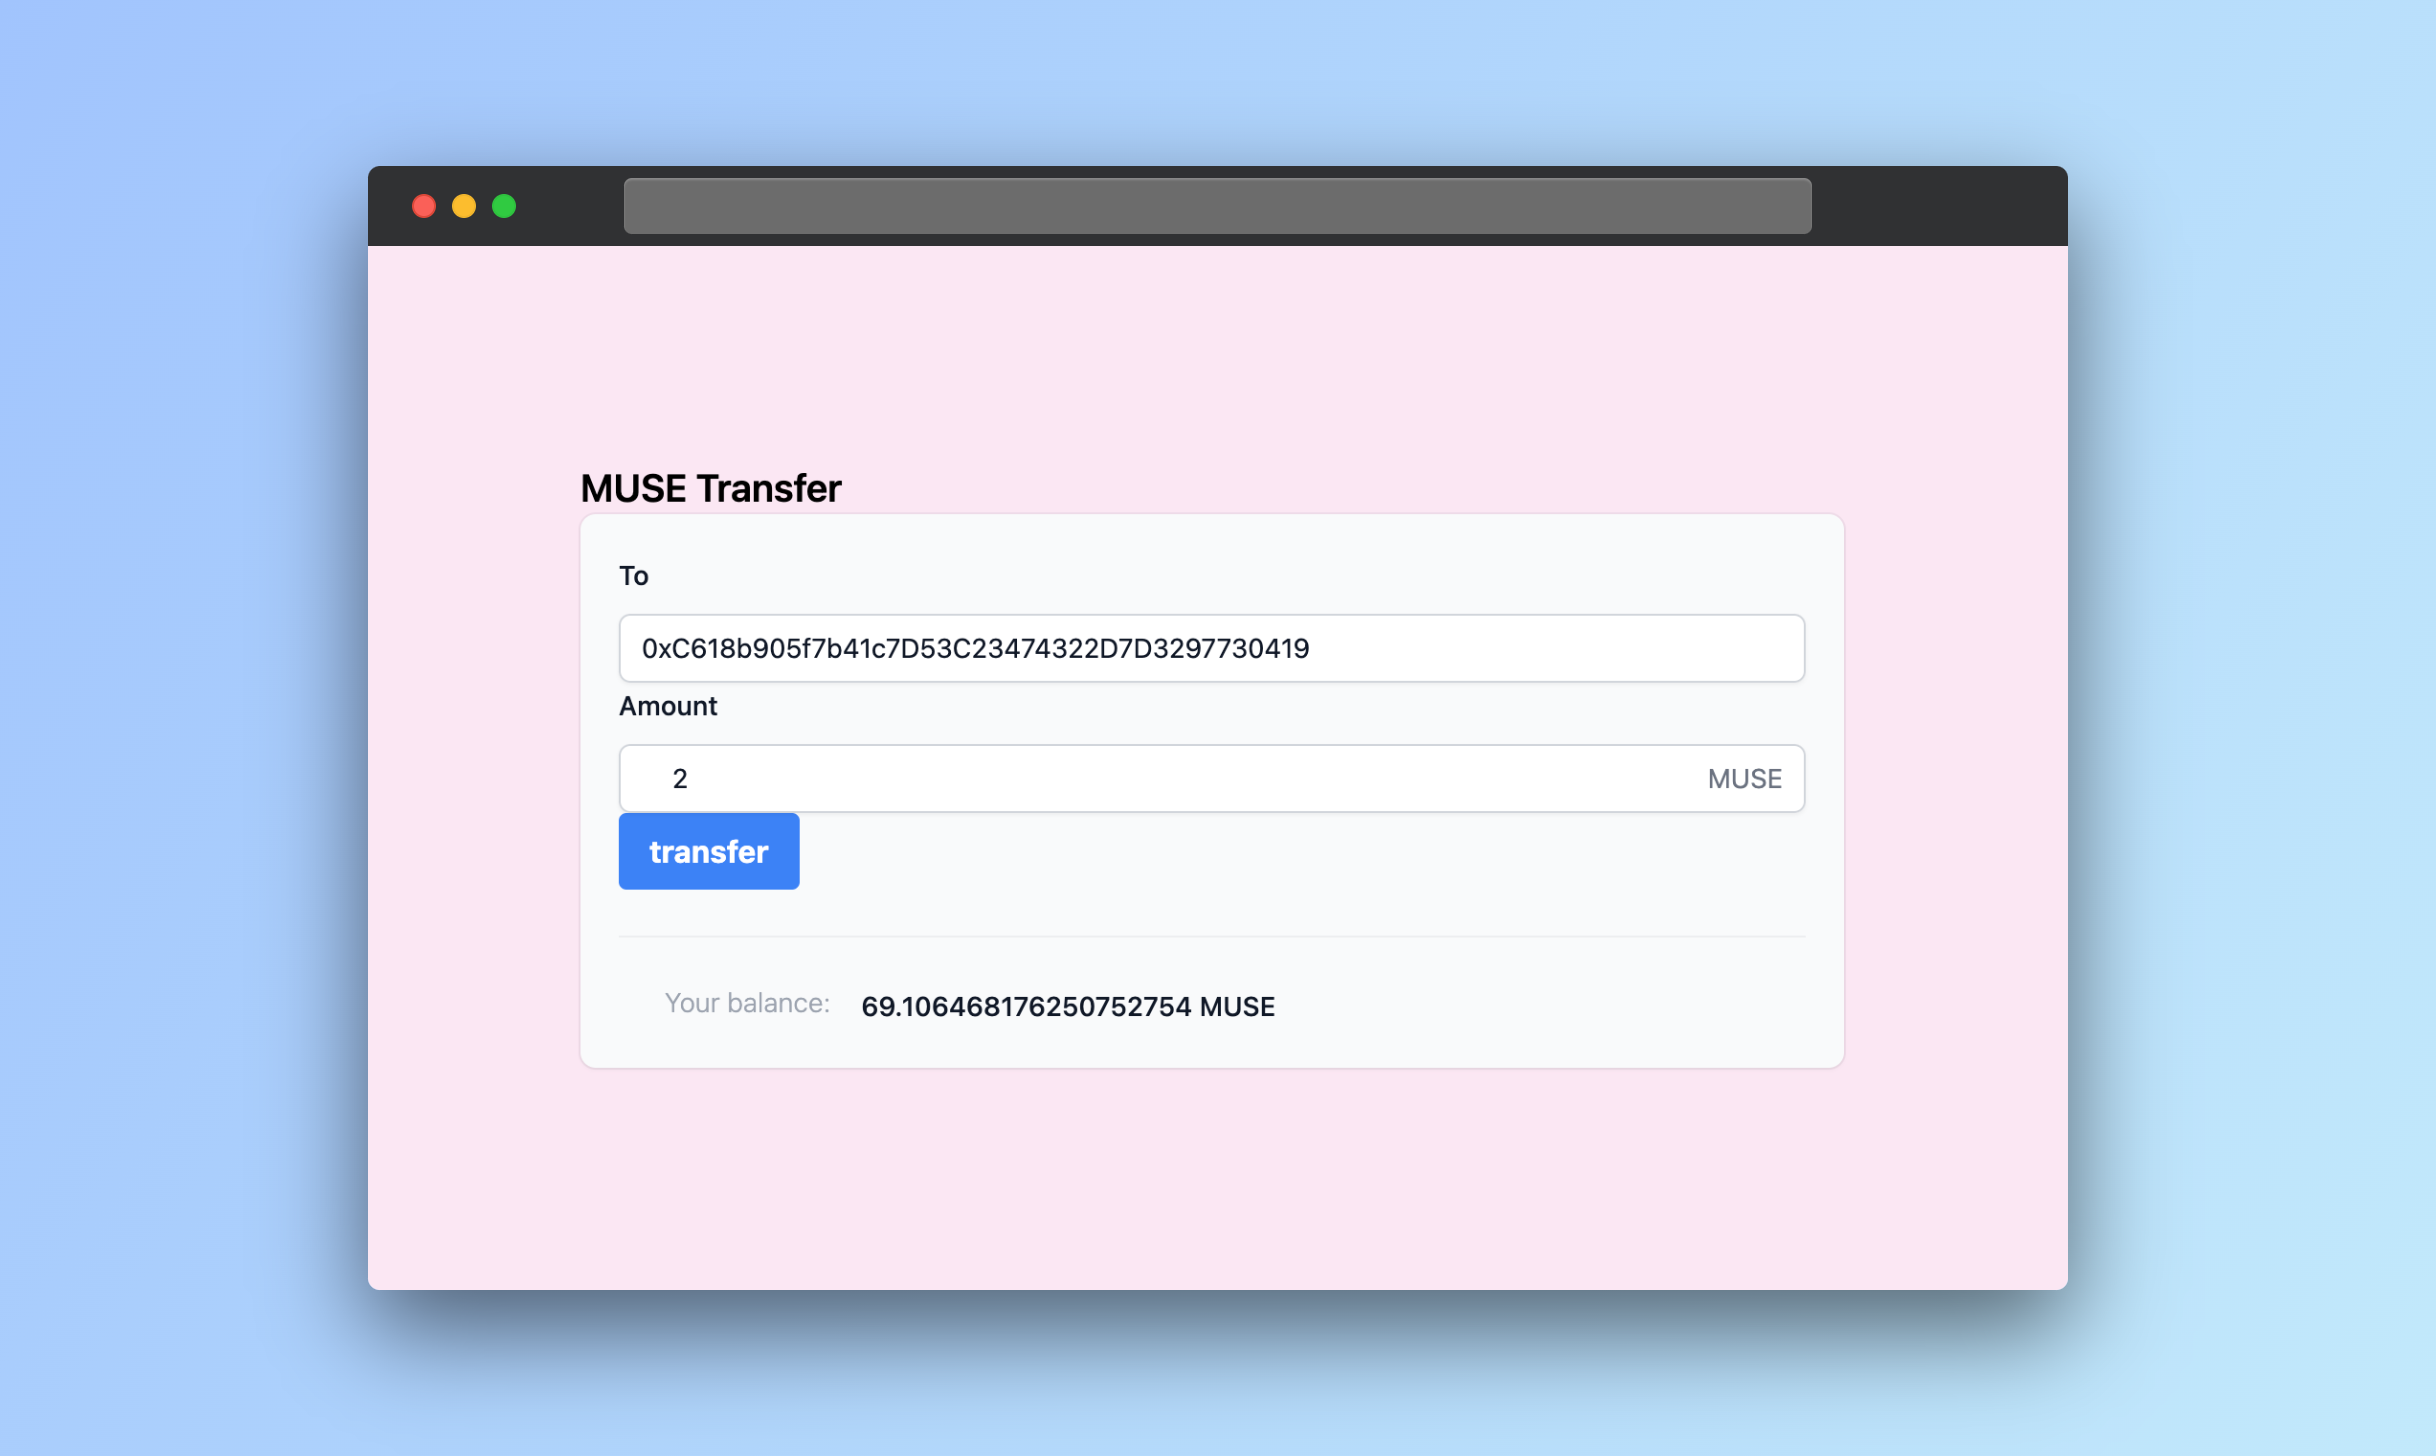
The features of our app will be:
- Display the balance of an ERC20 Token
- Transfer tokens
- Buy tokens from Uniswap
Getting started
Go to the editor page and connect your wallet:
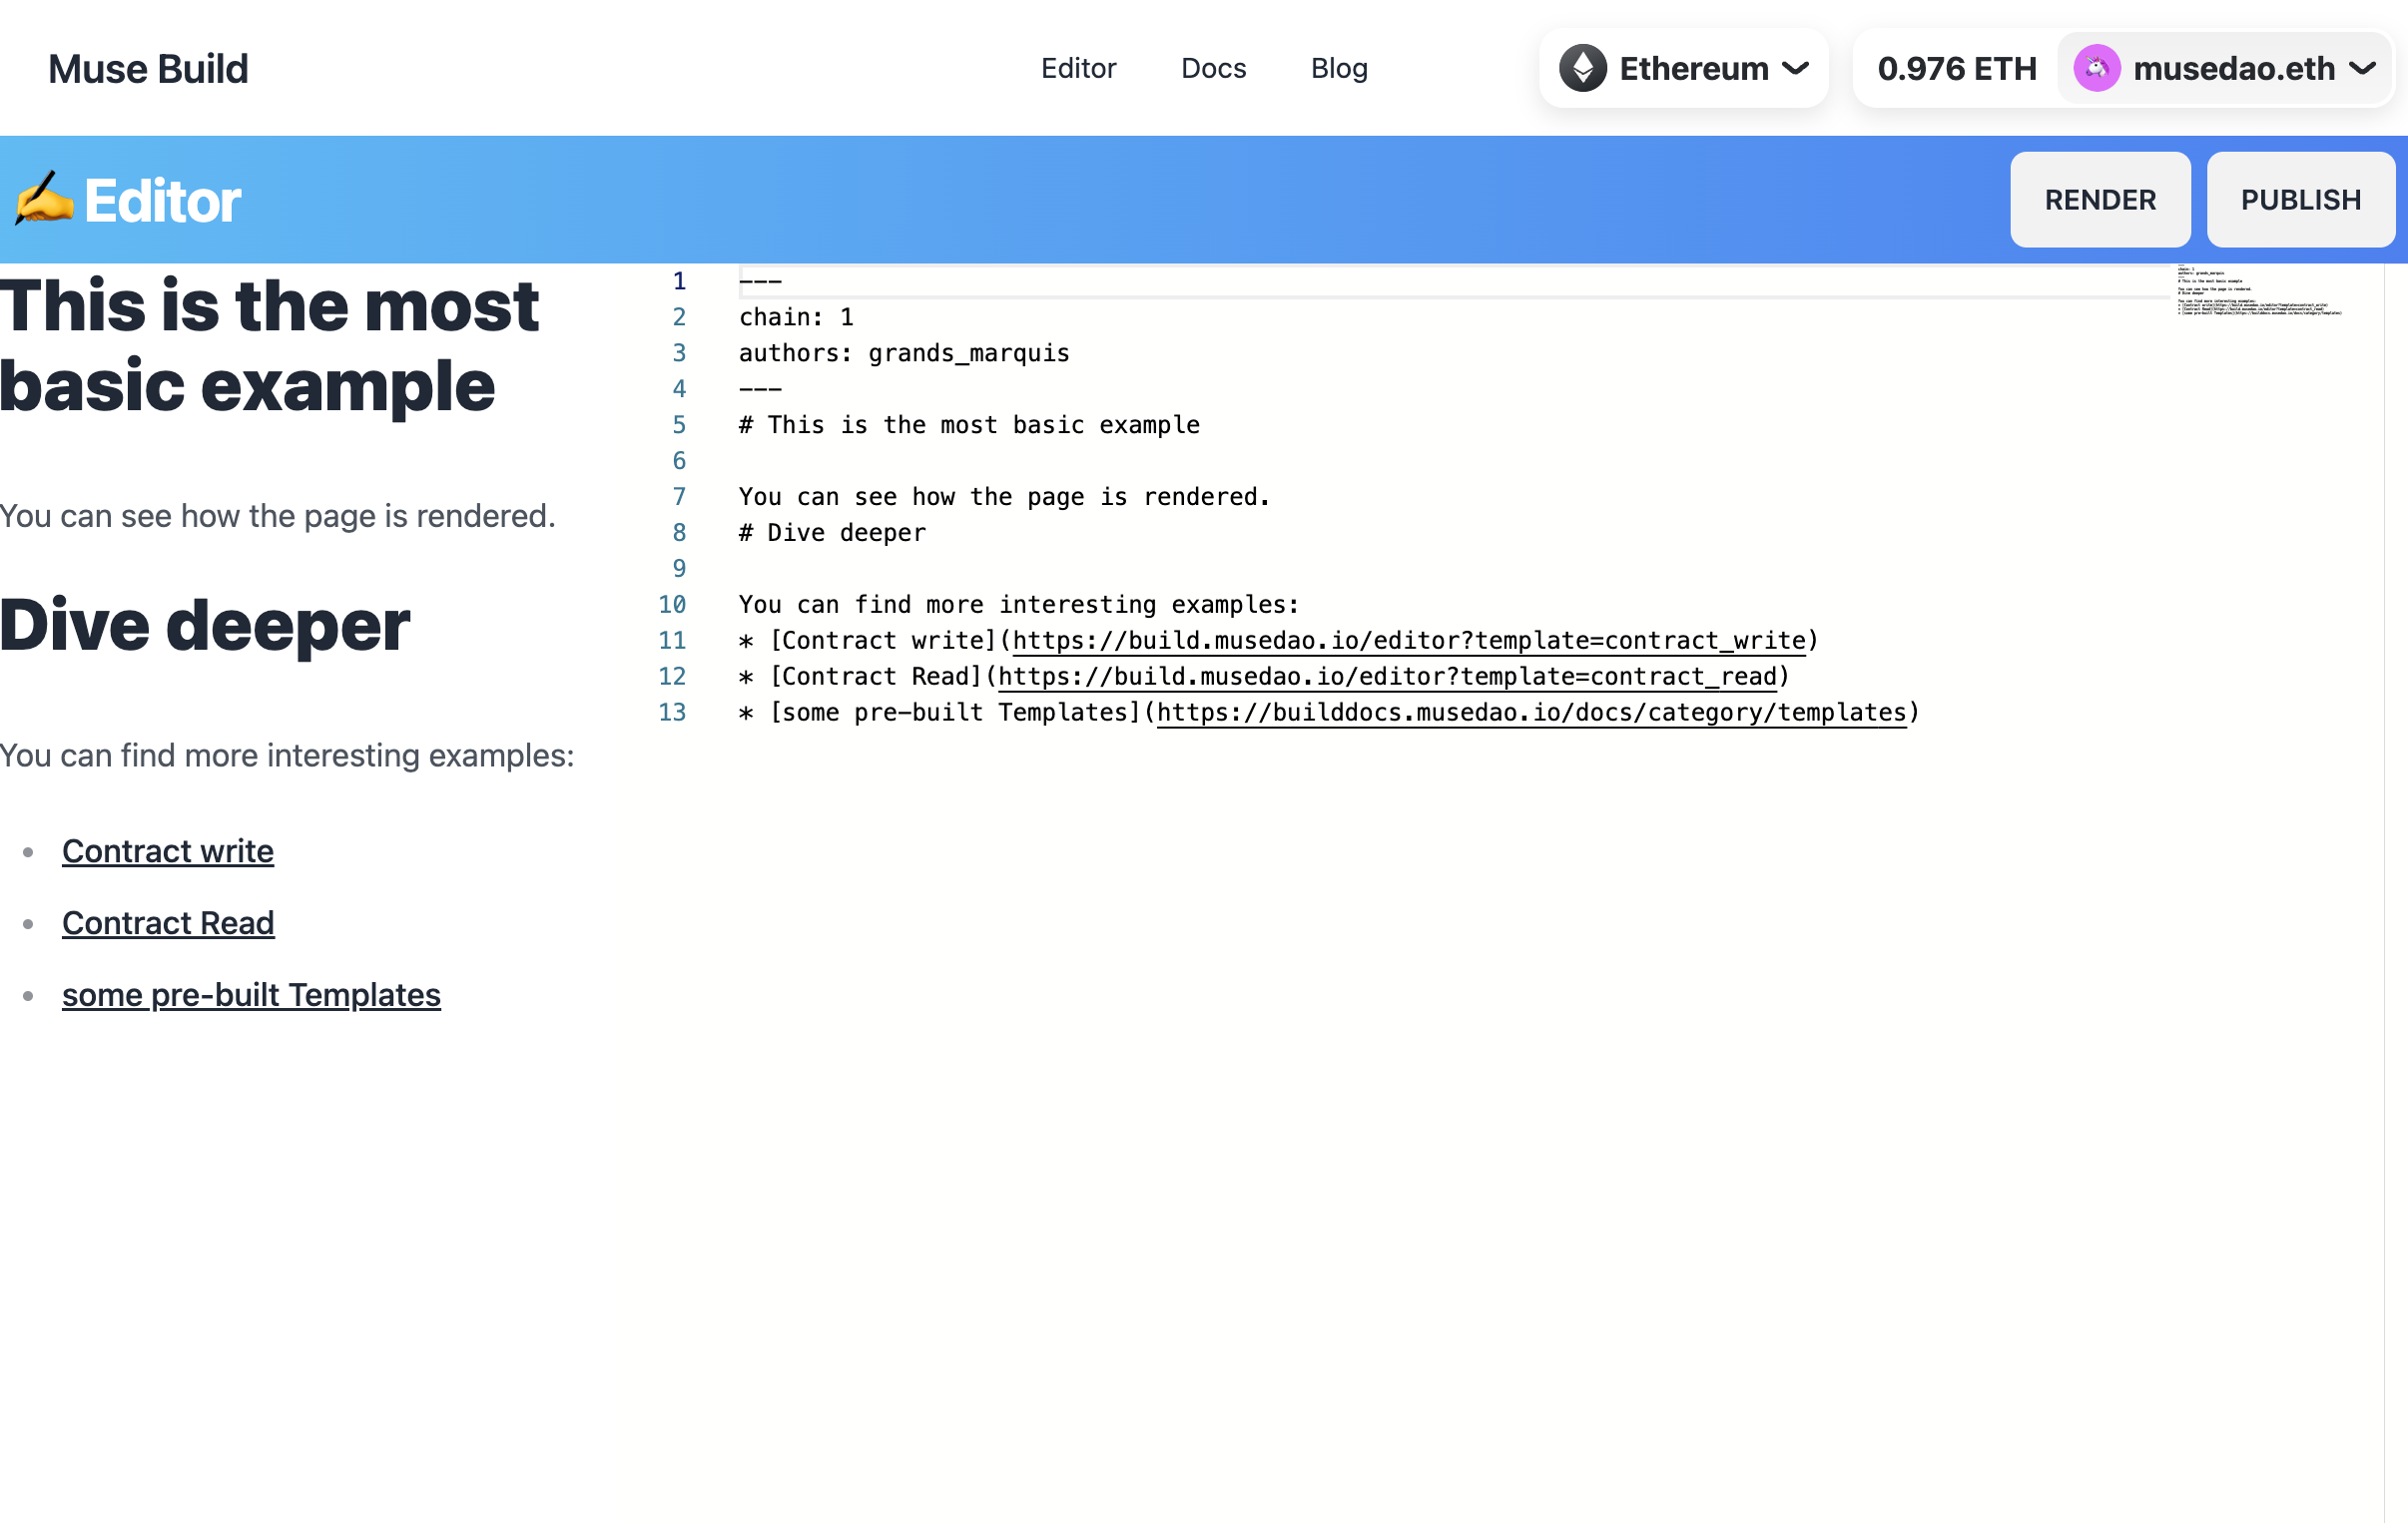
On the right side you'll see the code of your app and on the left side the preview. Get started by erasing all the code and type
---
chain: 1
authors: grands_marquis
theme: cyberpunk
---

# My first app

Welcome to my first app.
You can click the Render button on use the keyboard shortcut ⌘ + Enter. You'll see your page rendered on the left part of the app.
Display the token balance of the current user (TokenBalance)
Let's use our first component to display the token balance. Components accepts parameters as props. The token Balance component accespts two props:
address: the wallet to displaytoken: the address of the token
Let's display the DAI balance of the Tornado Cash app:
<TokenBalance
    address={"0x23773e65ed146a459791799d01336db287f25334"}
    token={"0x6b175474e89094c44da98b954eedeac495271d0f"} />
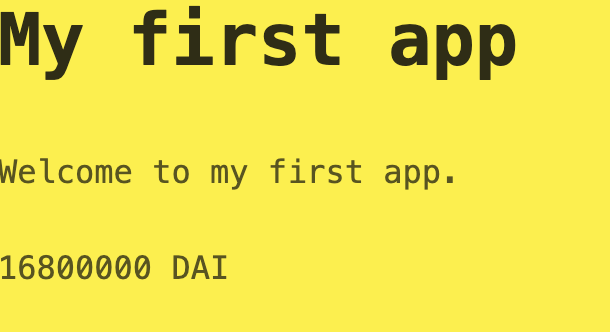
You should see something similar to this once you render the code:
For convenience we can store variables in our code as we'll probably re-use the DAI contract address. You can create variables at the top of your code like this and then use the variables in your app:
---
chain: 1
authors: grands_marquis
theme: cyberpunk
---

<>{(() => { TOKEN_ADDRESS = "0x6b175474e89094c44da98b954eedeac495271d0f"})()}</>

# My first app

Welcome to my first app.

## Token balance

<TokenBalance
    address={"0x23773e65ed146a459791799d01336db287f25334"}
    token={TOKEN_ADDRESS} />
If you want to change the address to display the balance of the currently connected user you can get its address using userAddress:
<TokenBalance
    address={userAddress}
    token={TOKEN_ADDRESS} />
Token transfers (ContractWrite)
In order to enable the user to transfer his tokens using your app let's use the ContractWrite component. It accepts several parameters:
address: the address of the smart contractabi: the ABI of the smart contractfunctionName: the function you want to callargsan array containing the default parameters you want to display
In our case, adding the component to our app will look like this:
## Send tokens

<ContractWrite
    address={TOKEN_ADDRESS}
    abi={[
        {
        "constant": false,
        "inputs": [
            {
                "name": "_to",
                "type": "address",
            },
            {
                "name": "_amount",
                "type": "uint256",
            }
        ],
        "name": "transfer",
        "outputs": [
            {
                "name": "",
                "type": "bool"
            }
        ],
        "payable": false,
        "stateMutability": "nonpayable",
        "type": "function"
        }
    ]}
    functionName="transfer"
    args={["0x0000000000000000000000000000000000000000", 1]}
/>
This will render:
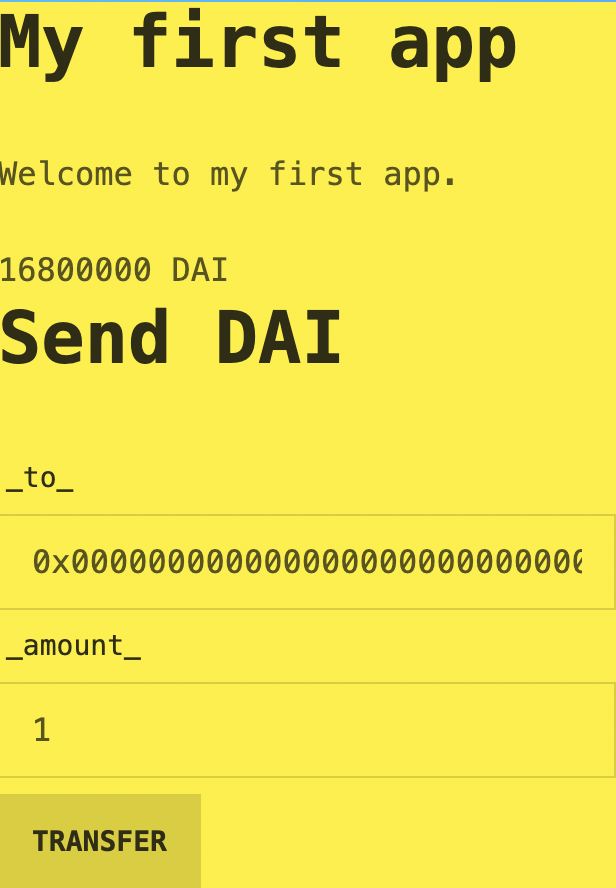
You can customize the ABI to make it more user friendly. In the inputs, let's change the inputs names (_to and _amount) to something more friendly. And in the amount input we can add a token property that will make our app understands that the amount is in DAI so it will properly handle the number of decimals:
## Send tokens

<ContractWrite
    address={TOKEN_ADDRESS}
    abi={[
        {
        "constant": false,
        "inputs": [
            {
                "name": "Reciever:",
                "type": "address",
            },
            {
                "name": "Amount to send:",
                "type": "uint256",
                "token": TOKEN_ADDRESS
            }
        ],
        "name": "transfer",
        "outputs": [
            {
                "name": "",
                "type": "bool"
            }
        ],
        "payable": false,
        "stateMutability": "nonpayable",
        "type": "function"
        }
    ]}
    functionName="transfer"
    args={["0x0000000000000000000000000000000000000000", 1]}
/>
Now it looks better:
Buy tokens (Uniswap widget)
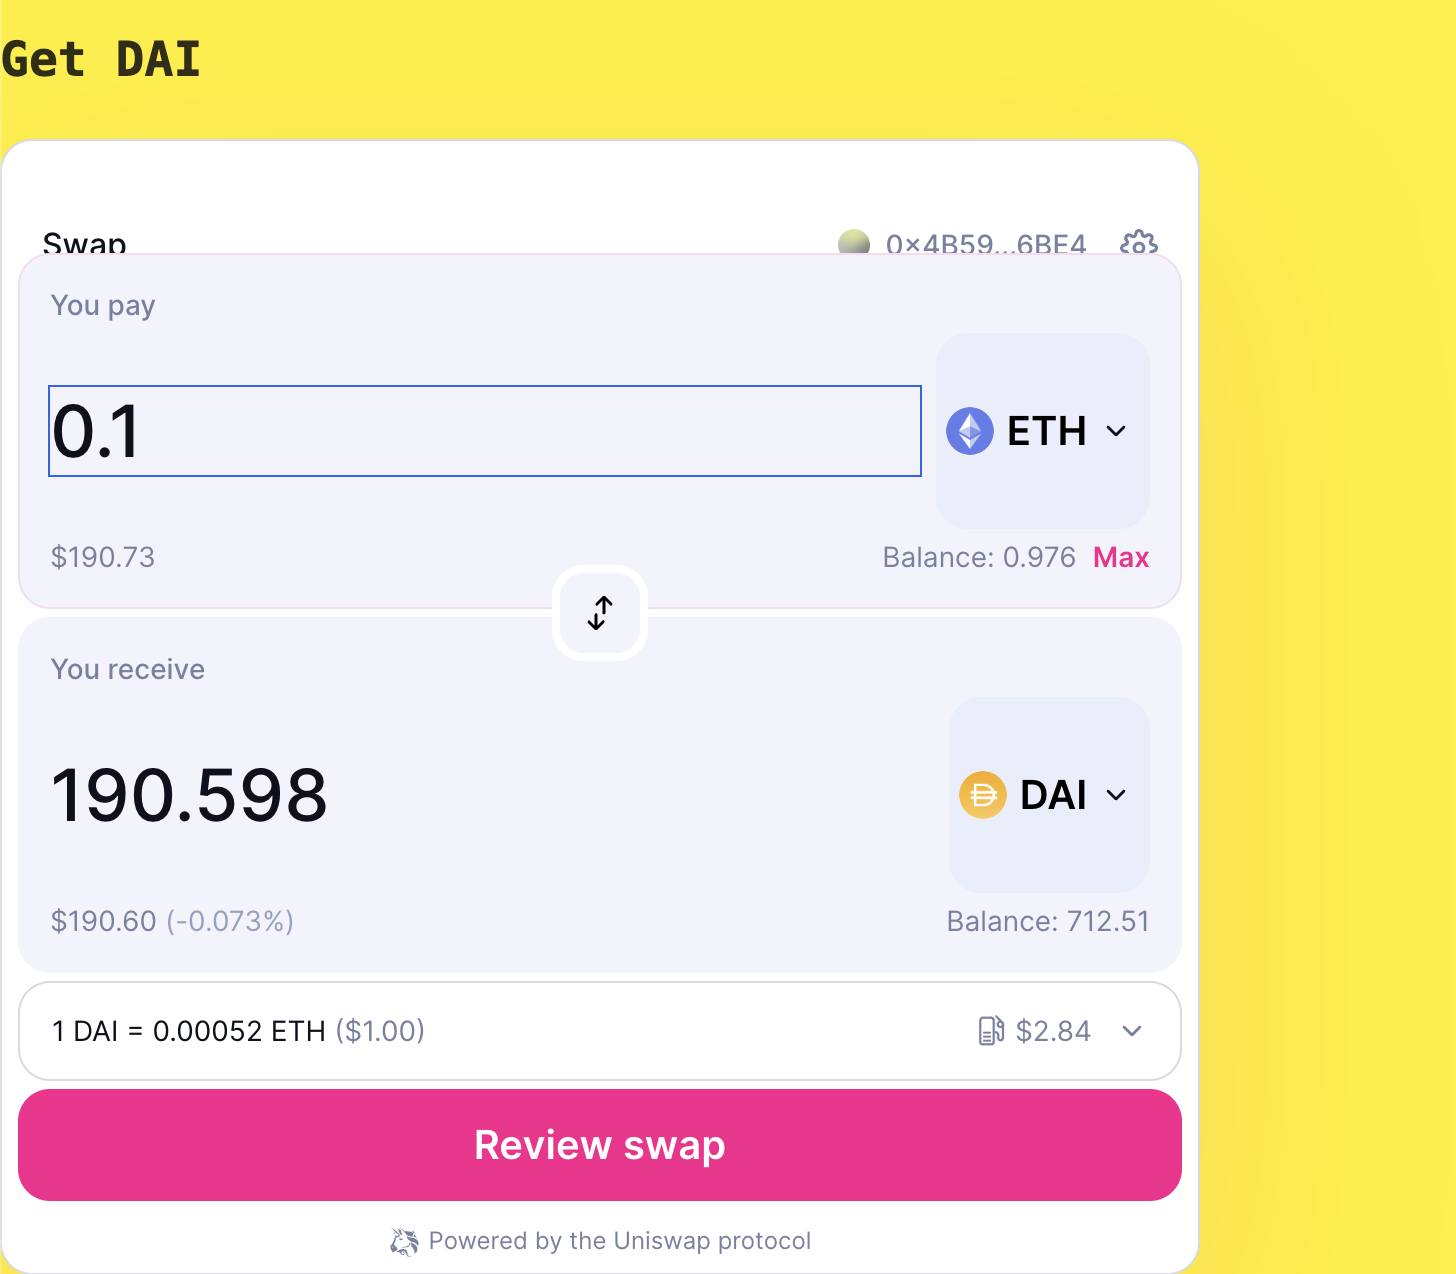
One of the available component is the Uniswap trade box. It accepts two parameters:
defaultOutputTokenAddressthe address of the token to buydefaultInputAmountthe preset amount of eth to buy with
add it to your app:
## Get tokens
<Uniswap
    defaultInputAmount={0.1}
    defaultOutputTokenAddress={TOKEN_ADDRESS}  />
it will look like this:
Complete code
Here is the complete code for our app:
---
chain: 1
authors: grands_marquis
theme: cyberpunk
---

<>{(() => { TOKEN_ADDRESS = "0x6b175474e89094c44da98b954eedeac495271d0f"})()}</>

# My first app

Welcome to my first app.

## Token balance

<TokenBalance
    address={"0x23773e65ed146a459791799d01336db287f25334"}
    token={TOKEN_ADDRESS} />

## Send tokens

<ContractWrite
    address={TOKEN_ADDRESS}
    abi={[
        {
        "constant": false,
        "inputs": [
            {
                "name": "Reciever:",
                "type": "address",
            },
            {
                "name": "Amount to send:",
                "type": "uint256",
                "token": TOKEN_ADDRESS
            }
        ],
        "name": "transfer",
        "outputs": [
            {
                "name": "",
                "type": "bool"
            }
        ],
        "payable": false,
        "stateMutability": "nonpayable",
        "type": "function"
        }
    ]}
    functionName="transfer"
    args={["0x0000000000000000000000000000000000000000", 1]}
/>

## Get tokens
<Uniswap
    defaultInputAmount={0.1}
    defaultOutputTokenAddress={TOKEN_ADDRESS}  />
Making it look beautiful (Styling)
At the begining of the file you can notice that we have a theme defined. You can change it to light or dark or any of the others included themes.
Our layout currently depends on Markdown to be styled. You can also use CSS and the included TailwindCSS to make your app looks awesome. See this same example styled here.
Publish your app
Once you are happy with your app, click on the publish button. We'll upload your code to IPFS and give you an URL to share it with others.
Congratulations 🎉
You now have the power to buid your own apps! Read more about the available components and see the examples.